Week 2 first evaluation of carousel
Carousel notes- Art and Design:
1. Evidence of me taking part: (Pictures, Diary entries,
Printouts Ect)
The evidence I collated during the Art and Design session of the Carousel was photos of me using different art materials to draw a organic object. The reason why I took these photos was so that people can see what I was doing during the Art and Design process and also for me to remember each step of what I was doing as well. At the end of the session I took some notes on my iPad to be able to be independent and also to be able to remember what I had done in the process. Furthermore, my teaching assistant also took notes for me as well as sometimes I am not very quick at typing.
The first evidence that I collated was a picture of me sketching an organic object which was an abstract shell.
Here is some photo to show my evidence:


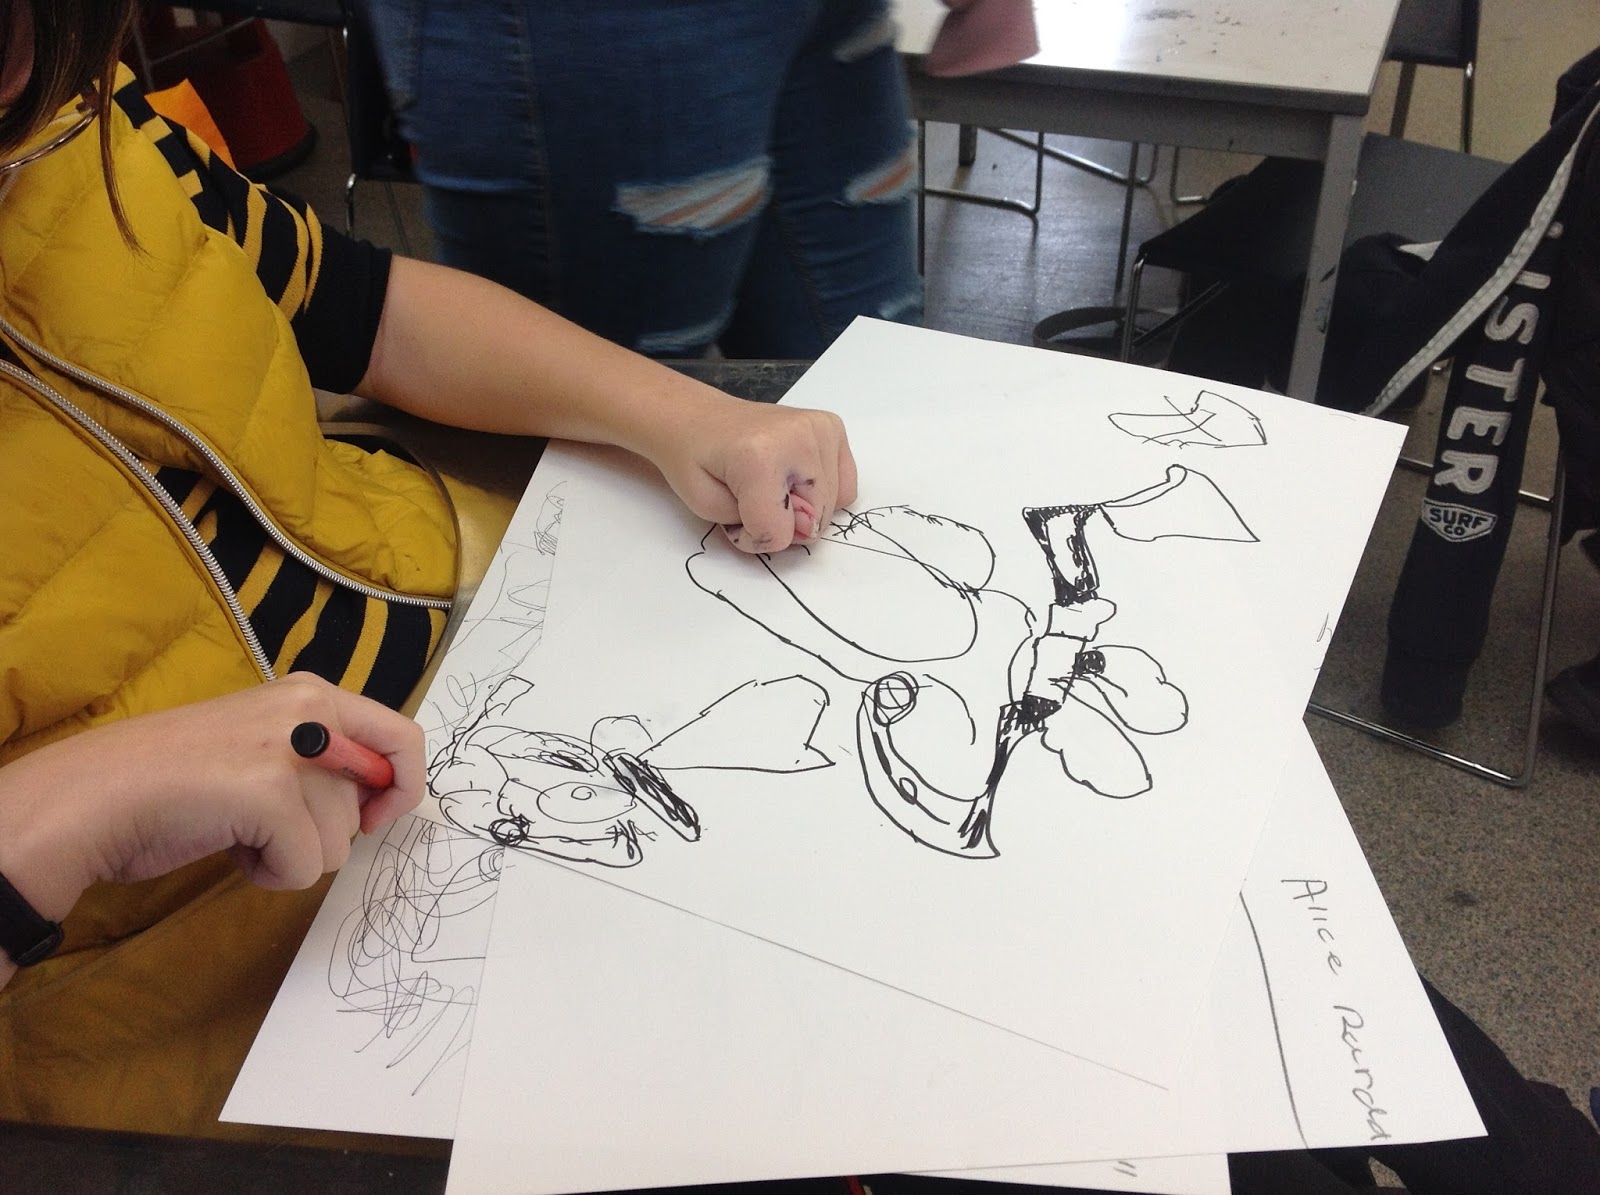
We did that task for 10 minutes and then moved onto another task which was instead of sketching the object with a pencil, we then had to create a scribble drawing of our object using a biro but the trick was not to take our hand off the paper and create a fast motion.
Here is the photo evidence for this:


The first evidence that I collated was a picture of me sketching an organic object which was an abstract shell.
Here is some photo to show my evidence:


We did that task for 10 minutes and then moved onto another task which was instead of sketching the object with a pencil, we then had to create a scribble drawing of our object using a biro but the trick was not to take our hand off the paper and create a fast motion.
Here is the photo evidence for this:

Then we had to use a different tool which was a fine marker pen, to draw our object. This was used to help us create different thicknesses of lines. When I was drawing with the fine marker pen, I found it easier to use and more flexible, as the ink is more dense and creates harsher and darker markings in comparison to using a sketch HB pencil. However there is less detail when using a fine marker because it is less subtle.

After that task what we had to do was draw the same object but draw it with a different tool, which was a fine marker this helped us to experiment with different thickness of lines. However this time instead of drawing one object on the page we had to draw two objects and one of them had to have water painted over the lines. (This is called blotting)
Here is the photo evidence of this :
Here is the photo evidence of this :

The water on the thickness of the lines of the drawing, helped us to learn different techniques, of how to create different forms of art and also to create different effects. For example when I brushed the water on the black lines of my drawing it created an interesting texture with an abstract effect. Putting the water on the black lines of my drawing also helped me to create a thicker texture, adding the water created a contrasting composition on the page.

Another task we was set by the art tutor was drawing with two different tools. This was with a pencil and a highlighter. This allowed us to see the 2 different contrasts between the lines of the pencil and the highlighter. The pencil had a fainter line in comparison to the highlighter, this had a harsher line. The point of this exercise was to improve our hand control when drawing. I found this difficult to hold 2 art tools simultaneously and to draw the same object, it was hard with my coordination to hold 2 tools together, this was a challenge. This required a degree of concentration, it felt like a focus exercise, which helped me improve my coordination skills.

Then we had to draw the same object using two different pencils simultaneously, this allowed us to improve our hand coordination when drawing. Whilst doing this there was a different degree of pressure on each pencil. This resulted in one being slightly darker than the other. This created a good composition, however not as detailed as using one pencil, it became increasingly harder to sketch and shade.
Here is the photo evidence of this:

The final activity we had to do was to choose one of the tools we had drawn with and be able to incorporate the skills we had learnt from the session and ,enjoyed the most. I chose to use the fine marker and water again, as I enjoyed the texture that it created and the various unique effects. When I created my final piece it created a contrast in colours. I preferred technique in comparison to the others allowed me to move my hand more freely and create more motion.
Here is the evidence of the final art piece I created.

Discuss any research that you carried out in these sessions: U2in the form of me partaking and experiencing using the different tools and techniques that u.1.1
The research that I carried out was primary research this was e had to use under demonstration of the art tutor, showing us the technique. The secondary research that was used was looking at past students work of art drawings.
Now list Primary and Secondary sources U2.2.1
Primary:
Primary sources including demonstrating the different techniques with different art materials including the: sketch HB pencil, a biro pen, a fine marker pen, a highlighter. These were used in a range of ways. For example holding 2 pencils simultaneously also holding a highlighter and a pencil together. We did this to experience different techniques and ways of drawing.
Secondary:
The secondary research I carried out was looking at past students examples of work and to observe the teacher demonstrating how to use different techniques with the different art materials. For example when we did the first task using the HB pencil we had to try and create different line texture for example one of the textures I created for the first task was shading.
Discuss any skills that you have tried: U2.1.1
I have previously mentioned in this blog the skills that I have tried, however I will elaborate on them. Firstly I drew my object with a HB pencil and the first skill I tried with was using shading on the outer lines of the drawing to create different tones. The tones create contrast in the drawing which provides more detail this is due to the subtle or harsh movements of the pencil. The next skill I learnt was using a biro pen, this was where we had to create a scribble drawing, in other words, we had to use a really fast motion with our hand and use a lot of pressure on the pen. The skill I learnt from this was control and flexibility of the hand. The biro allowed more flexibility however you cannot use tone as well ,as it is hard to shade. The lines are the same density. Furthermore another skill used was using the fine marker pen, this was thicker than the other tools that I used. The fine marker allowed me to create bold and harsh lines, which is useful for abstract. As one block colour is used, this stands out, and contrasts with the page. However even though the marker pen created thick harsh lines, when water was added it softened the lines and displayed a more abstract effect as there was different colours merging from the black ink, this effect cannot be predicted as it runs freely, so good hand control is essential for this activity so it does not run over or tear the page. It must ensured that the paper is dried otherwise it might not create the desired effected, or the water could travel through. The next skill used was the two pencils, this helped to create a lighter tone and a darker tone simultaneously and create a good composition of both. In comparison to when the highlighter and the pencil was used as these tools are completely different textures and thicknesses. It is necessary to have an equal amount of pressure and good hand coordination as you are holding two objects at the same time.
2c Discuss any processes and methods you used (Photography wet process, Screen Printing, Photoshop layering etc): U1.1.1
What is your understanding of these?:
Processes:
Processes:
I used drawing as a process. Drawing is required as a process to use different tools and different techniques to produce my picture.
I also used blotting as a process. Blotting is where water is brushed on to paper which has pen already on it. And you can use differing amounts of water to create different textures.
Methods
The method I used to draw included using different shading of a pencil to create tone and thicknesses. Also using a marker pen to create denser tones in a block colour, this resulted in a bold tone.
The method of blotting includes brushing the water on the paper which has marker pen on it, after the paper is blotted to help achieve an abstract effect. A paper towel is used to stop the water from running and possibly destroying the image.
2d Discuss the tools that you used (Paint, Material, Software, etc):
The tools that were used was a pencil for sketching and shading lighter and darker tones. Another tool that we used was a biro pen for creating denser lines that resulted in a more prominent tone and also allowed fast movement. In addition to this a fine marker pen was used to create a dense and heavy tone which didn't allow detail. Finally the last tool used was a orange highlighter, this created a brighter colour that was sharp on the page, as highlighters have sharp edges which produces a well defined line.
Evaluate your use of them
How effective were you with this tool?
How could you improve your use of the tool?
How could you improve your use of the tool?
With the pencil, I think I effectively used this tool as I used various techniques such as shading and sketching, if I were to use the tool in the future to utilise it more effectively I could of used more contrast with my shading and varied my different tones. I could encorporate lighter and darker tones.
I could say I used the biro pen effectively as we were asked to create really fast motion, I did this successfully however on some occasions my pen came off the paper as the motion was very fast. To improve next time I would focus on keeping my pen on the page and use coordination.
The marker pen was an effective tool for me to use as it was easier for me to draw with and it allowed flexible movement. also I incorporated blotting with the marker pen which I found effective in creating subtle more abstract images. If I was to use the marker pen on another occasion I would continue to empaphise the harsh dark lines.
Finally the highlighter was the last tool I used, I didn't find that I used this as effectively as it was in combination with another tool, if I used this in the future I would use on its own as I feel it would be easier for my hand control.
1. Evidence of me taking part: (Pictures, Diary entries, Printouts Ect)
Printing- Mono Printing
After we had completed our final sketch, we went to the print room to learn about Mono printing and to create traditional prints of our art works using black ink.. The evidence I gavered was photos of me tracing over the ink drawing and also all the materials you need to make in ink print.
Here is the evidence of the black ink

Before we started making our prints we had to learn about some health and safety rules when you are in the printing room and creating the prints.
- We an apron to protect your cloths as the black ink is indelible and want come off easily.
- ware gloves to make sure you keep your hands clean.
- Be mindful of equipment.
When creating the prints , the ink had to be rolled onto a grass tray using a roller and it had to be an A4 size.

Then we had to taped a piece of paper onto the ink , because we had to trace with a pencil around one of the sketches that had been designed in the art room to get an ink print of the photo.
Here is the photo evidence of me tracing the photo when it was on the tray of ink. with a pencil.

2a Discuss any research that you carried out in these sessions: U2.1.1
In addition to this we didn't get to experience any evidence any evidence of secondary research as we didn't have much time to look at other students prints.
Now list Primary and Secondary sources U2.2.1
Primary: The tutor demonstrating the task.
Me performing the task of making the mono print.
Secondary: If we had more time being able to see other students work.
2b Discuss any skills that you have tried: U2.1.1
The skills that I tried during this session was mono printing, ink rolling and tracing around my ink print.
What is your understanding of these?:
Processes
The process that I used with mono printing was putting a small amount of black ink onto a glass tray and rolling it out with a roller into a A4 size.
Then I had to place a drawing of an object that had been drawn previously by one of the art students and then I traced around the whole of the drawing including the inside of the object as well as the outside with a pencil.
Methods
The method of mono printing includes a glass tray a small amount of ink and then roll The ink onto the tray using a roller , then placing a piece of paper down onto the ink and tracing over the drawing.
2d Discuss the tools that you used (Paint, Material, Software, etc): U2 3.1
Evaluate your use of them
Evaluate your use of them
How effective were you with this tool?
With the tube of ink unfortunately I couldn't be very effective with it because of my weakness in my hands, with a squeeze tubes or bottles. Therefore I needed to have assistance to do this for me. In addition to this I couldn't use the roller effective etheir and had to have support to help me roll it as it was really heavy.
I wasn't very effective with sellotaping the paper to the glass because, I find it a bit fiddly , so next to I would use bluetac to be able to be more independent to stick the paper to the glass tray.
I was effectivity when I was tracing around the abject, as I managed to create dark tones of ink coming though the other side of the paper.
How could you improve your use of the tool?
If I did this next time rather than having a tube of ink to help me be more independent , the ink could be on a plate and I could spoon it out to make me as independent as possible.
to improve the use of the roller for me to be independent as possible I would make sure next time I would just practice the movement of using the roller effectively in a smooth motion with even pressure and consistency.
I could improve the pencil by next time trying some different shades of tones to create contrast throughout my sketch.
self Evaluation:
I found the process of learning about Mono printing interesting as I got to see how digital prints can be made into ink sketches, although I'm not the best at doing art or sketching, However, I think learning about different departments helps to broaden your knowledge and it helps you as a student to challenge yourself.
overall I enjoyed sketching over the picture with the pencil as I could be independent , However, the were some elements , I couldn't achieve without assistance due to my strength in my hands . Such as rolling the ink into a A4 size . This was because the roller was to heavy for my hand strength, and getting the ink out of the tube onto the glass tray. But even though I had to have some help it's helping me to understand what things I can do independently and what stuff I need assistance with.

Comments
Post a Comment